17 October 2011

crochet school...

is going very well! Dana @ Crafty Minx is a great teacher - very thorough with her explanations, and the videos are great! I have tried (and failed) to teach myself from books before, and never was able to get past the chain stitch, but I've progressed this time!


This is my single crochet stitch swatch (it's much farther along now, as we have covered the half double crochet, the double crochet, the treble crochet and the double treble crochet, but I have yet to upload the photos!) after the first week - not too shabby, eh? And here is my very first completed 'project' - a dishcloth:


01 October 2011

because I don't think I have enough to do...

I've decided to take an online crochet class! I've wanted to learn crochet and knitting for some time now - I bought a couple of books and gave it a go on my own last year - I stumbled upon Dana's blog, Craftyminx, and there was a post for Crochet School! Can't wait to give it another try!

03 May 2011

FRED...


Let me introduce you to 'Fred', a progressive card that my crafty Tweeps & I made for Sue. If you have just happened upon this post (perhaps because my feed came up in your reader and showed that I posted for the first time in months?!?!?), start back over here at Lydia's blog for the back story & hop along with us 


See how he came together (below) just before he went to Sue:


This was a bit of a tough project for me... if you've followed the hop then you've see Fred in his various stages... what one thing to add? I thought of flowers because of the pretty butterfly, but the combinations I tried all seemed to overwhelm. I loved the lace and pearls in the middle, and I didn't really want to cover up much more of the pretty patterned papers by stamping another image, so I tried tying a pretty bow in some taffeta ribbon, but that was also a little too 'much', if you know what I mean? I settled for a little ruffled ribbon... I think it added a pretty, soft touch - a nice way to send off Fred.

03 August 2010

top 2 tuesday...

what a fun idea! I'm a follower of Lauren's blog, and she had a post for Taylor's Top 2 Tuesday & I thought it was a great idea. This week's theme is 'Simple Pleasures':


  1. Going to bed early but chatting with Shawn late into the night (early into the morning!) - I just love hanging out and talking to my husband - he honestly is my best friend.
  2. Beach walks with Shawn and the boys - Harley & Milo are huge fans of the beach so we try to get them out there as often as we can to romp and play... nothing tires Milo out like chasing Harley through the water for a ball!

You should head over to Taylor's blog to read some more simple pleasures and link up your own! Oh, and clean sheet day would definitely be on the list, along with Starbucks in bed for birthday morning!

09 July 2010

you KNOW it's hot...

when he comes in from outside and even his bed directly under the AC vent isn't cool enough! He's decided he's now lounging on the wood floor because it's just that much cooler than his bed:

06 July 2010

what I've been doing...


Playing with all my new SU! goodies!!  That's right... It's the most wonderful time of the SU! year... the new catalogue went live on July 1st, and I've been playing with my preorder goodies, making up samples for my groups and classes:


This card uses the new taffeta ribbon in Daffodil Delight, and that beautiful hydrangea image is a Level 1 hostess set! The kraft Crumb Cake card front is embossed with our new square lattice embossing folder... I just love the wonderful deep impressions you get with these folders!


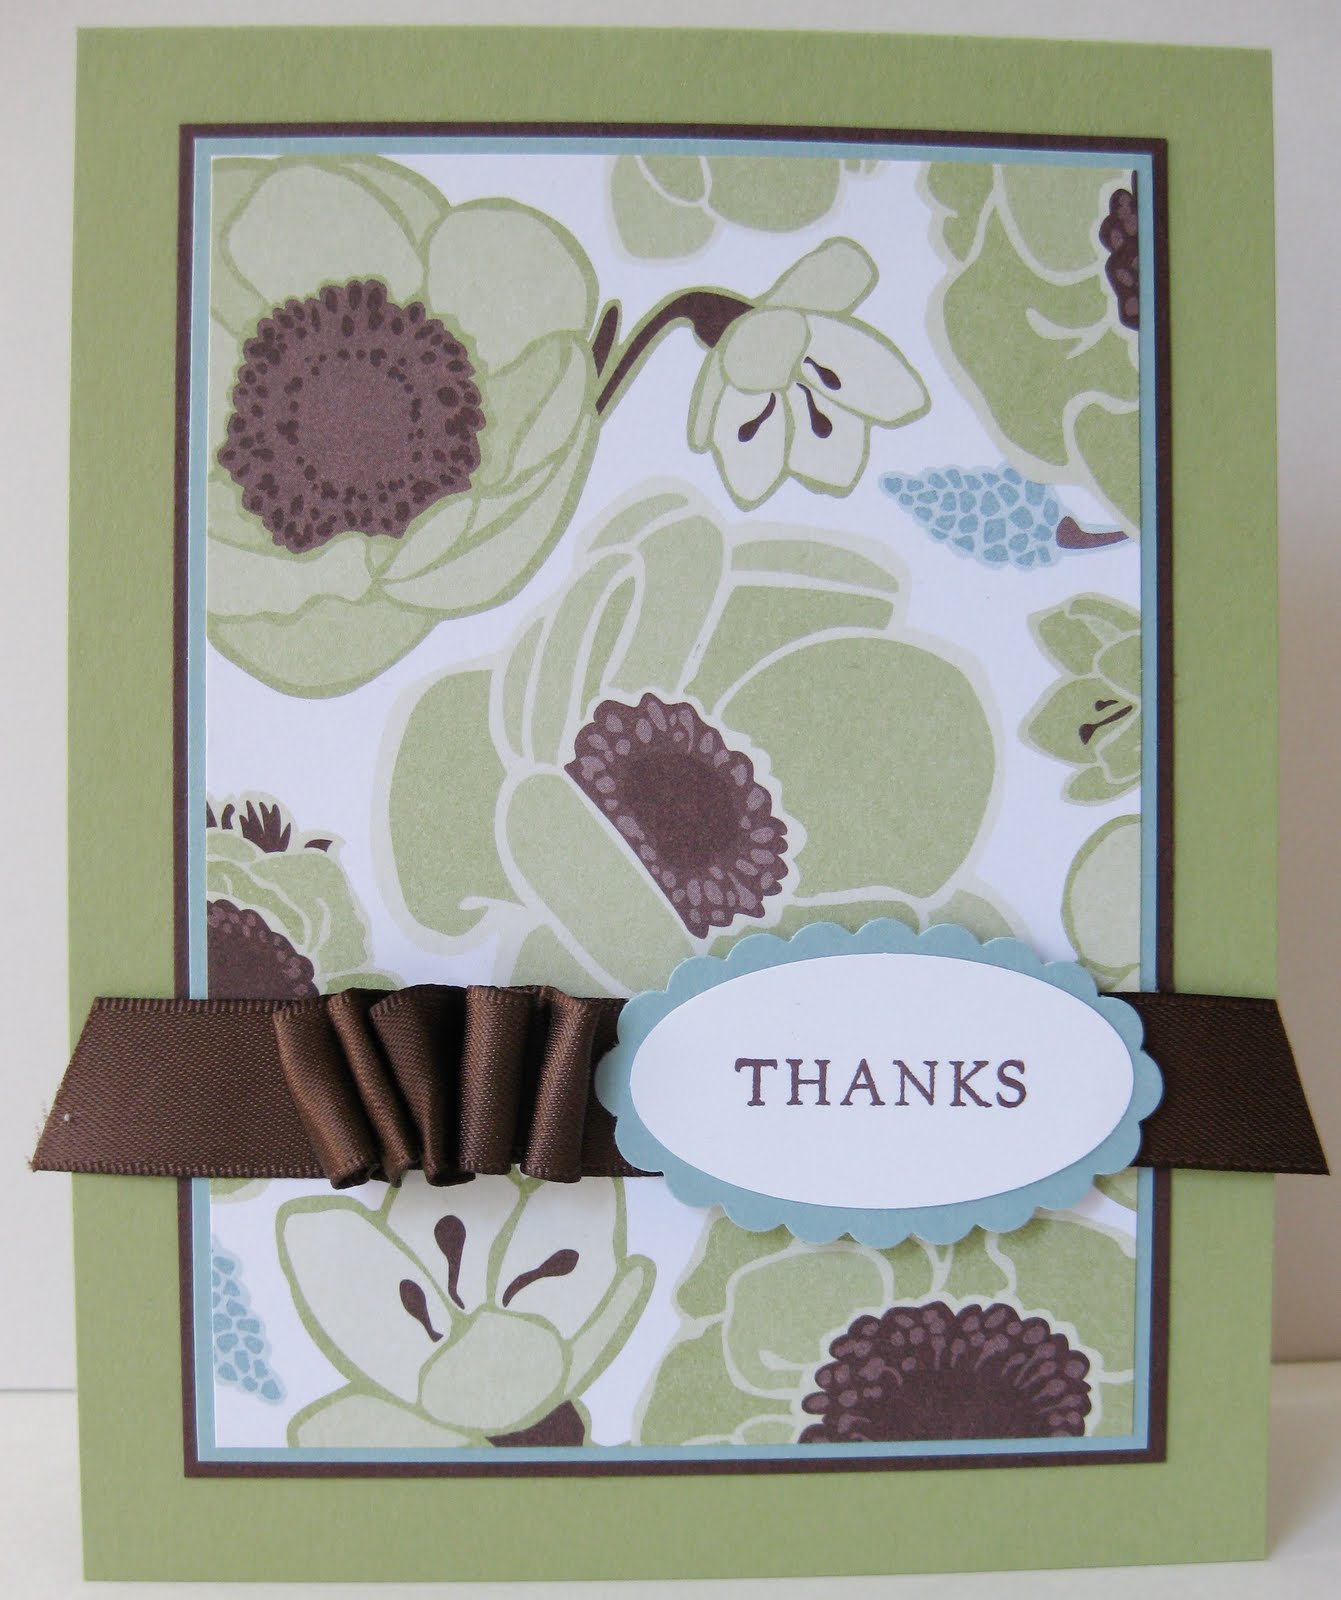
Here, I decided to let the gorgeous new designer paper be the star of the show... just accented with a ruffle of Chocolate Chip satin ribbon and a scalloped oval punch.


This card uses the reinker float or reinker spread technique, made popular by Crystal French, that has gone viral on the web.  It's really very simple: emboss your image in white on SU! shimmery white cardstock, then spritz the image liberally with water - the water will pool within the embossed lines of your image. Put a drop or two of reinker (I used Pink Pirouette for this one, but I've seen beautiful combinations of colours if you Google 'reinker spread technique') on a piece of acetate and touch the tip of your aquapainter to it and then touch the inked tip of the aquapainter to the pools of water on your image... Watch the magic happen! I went over a couple of areas again to give the darker colour since I wanted to do a single colour image.


This card is not all SU!... it uses up some of an SEI paper pack that I had was given awhile ago and am just now breaking into.  I thought the shiny patterned paper could be the star of the show (although it was a little hard to get a photo to show it accurately!) with just a little ruffled ribbon and a sentiment from the new SU! level 3 hostess set, Occasional Greetings. I must say that I think this is my new favourite way to add ribbon to a project without the bulk of a knot or a bow - it just adds that little something!